Hypervisor on Module (AN56)
| Affected Products | All congatec products that support the RTS Hypervisor |
|---|
Preface
This Application Note gives a general overview of how to install, configure, use and troubleshoot the RTS Hypervisor on congatec x86-based modules.
For more information about the RTS Hypervisor, refer to the RTS Hypervisor Manual RTS-Hypervisor.pdf (the manual is available for registered customers).
Terminology
| Term | Description |
|---|---|
| ESP | EFI System Partition |
| GPOS | General-Purpose Operating System |
| OS | Operating System |
| RTS | Real Time Systems |
| RTOS | Real-Time Operating System |
Introduction
As part of the aReady.COM strategy, the RTS Hypervisor is now integrated into the congatec firmware by default on congatec x86-based modules. The integrated RTS Hypervisor offers a 30-day free evaluation license. The 30-day evaluation starts when the customer receives the x86-based modules.
The Real-Time Operating System images, driver packages for the General-Purpose Operating System and the installation procedures for the Operating Systems are available for download in the restricted area of congatec website at www.congatec.com/login
The packages available for download are listed in the table below.
| Package Name | Description |
|---|---|
| RTH-Release_R5.7.03.31618_INtime_runtime.zip | Prepared Evaluation Package for INtime DRTOS |
| RTH-Release_R5.7.03.31618_Linux-rt_runtime.zip | Prepared Evaluation Package for Debian with prempt-rt |
| RTH-Release_R5.7.03.31618_Linux-xenomai_runtime.zip | Prepared Evaluation Package for Debian with Xenomai |
| RTH-Release_R5.7.03.31618_QNX_runtime.zip | Prepared Evaluation Package for BlackBerry QNX. Only provided with GPOS Windows |
| RTH-Release_R5.7.03.31618_VxWorks_runtime.zip | Prepared Evaluation Package for WindRiver VxWorks |
Installing the Packages
This section describes how to install and configure the packages for the integrated RTS Hypervisor.
Installation Requirements
Before you install the packages for the integrated RTS Hypervisor:
- Make sure a General-Purpose Operating System (GPOS) is pre-installed. The General-Purpose Operating System must be installed on a mass storage connected to an AHCI controller or an NVMe controller.
- The RTS Hypervisor supports different types and versions of GPOS. For the list of GPOS types and versions supported by the RTS Hypervisor, see https://www.real-time-systems.com/products/os-compatibility/
- Assign at least 128 GB storage to the System Drive (C:\) if you use Microsoft Windows OS as General-Purpose Operating System. The System Drive must have at least 4GB of free disk space.
- If you use a Linux OS as General-Purpose Operating System, the ESP partition must have at least 300 MB of free disk space. The root file system must have at least 1 GB of free disk space.
Download Installation Package
- Log in to the congatec customer portal at www.congatec.com/login
- In the “Technical information” list, click “Virtualization Ready RTOS Packages”. The package page opens.
- Download the appropriate packages for your GPOS.
Install the Downloaded Package
The downloaded package contains installation scripts for both Windows and Linux General-Purpose Operating Systems.
Run the installation_for_windows.bat script for systems pre-installed with Windows Operating System. The installation steps are described in section Windows Operating System. For systems pre-installed with Linux Operating System, run the installation_for_linux.sh script. The installation steps are described in section Linux Operating System
Windows Operating System
- Unzip the downloaded package for your intended Real Time Operating System to a location on your system for the RTS Hypervisor. For example,
C:\Users\rts\Desktop - Open the command prompt.
- Navigate to the directory of the extracted package. For example:
cd RTH-Release_R5.7.03.31450_Linux-rt_runtime
- Type
installation_for_windows.batand press Enter.
.png)
- The "User Account Control" prompt appears
- Click Yes to confirm.
.png)
- The installation process begins. The output of the command line is shown below:
- The installation is complete, when the command line output shows "RTS Hypervisor Installation done".
.png)
Linux Operating System
- Open the command line interface.
- Unzip the downloaded package for your intended Real Time Operating System to a location on your system for the RTS Hypervisor. For example,
/home/rts/Downloads
#cd /home/rts/Downloads#unzip RTH-Release_R5.7.03.31450_VxWorks_runtime.zip
.png)
- Navigate to the directory of the extracted package. For example:
#cd RTH-Release_RS.7.03.31450_VxWorks_runtime/
- Type
bash installation_for_linux.shto run the installation script (requires root privilege)
#bash installation_for_linux.sh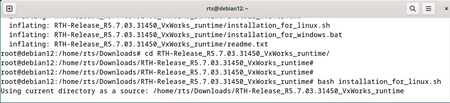
.png)
- The installation process begins. The output of the command line interface is shown below:
.png)
The installation is complete, when the command line output shows "Script finished successfully".
Select Boot Priority
To activate the RTS Hypervisor, you need to change the "1st Boot Device" in the BIOS setup menu to "Integrated RTS Hypervisor".
- Press F2 or DEL during POST to enter the BIOS setup menu.
- Go to the Boot tab to enter the Boot setup screen.
- Select "Integrated RTS Hypervisor" as "1st Boot Device".
- Go to the Save & Exit tab and select "Save Changes and Exit".
The system restarts.
.png)
Note:
The configuration steps and the BIOS setup menu above are valid for "Type Based Boot Priority".
For “UEFI Boot Priority”, the BIOS setup menu may differ.
Boot Messages and First Steps
Sample screen shot of the RTS-Hypervisor boot messages.
.png)
When the system starts or restarts, the General-Purpose Operating System controls are screen while the Real-Time Operating System runs silently in the background.
.png)
The pre-built congatec demo images for Linux, VxWorks and QNX real-time systems contain a telnet server. Connection to the telnet server is possible with the default IP address (192.168.2.2) of the virtual network in the Real-Time Operating System.
For information about user credentials, see the Hypervisor Manual RTS-Hypervisor.pdf (the manual is available for registered customers) included in the download package. The INtime D-RTOS demo image does not contain a telnet server. It uses a webserver. To access the webserver, open a web browser on your General-Purpose Operating System and go to http://192.168.2.2
For more details, see the Hypervisor Manual RTS-Hypervisor.pdf (the manual is available for registered customers) included in the download package.
Override the Default Boot Selection Manually
You can override the hypervisor as the default boot selection if the RTS Hypervisor has configuration issues. To override the hypervisor:
- Turn on the system.
- Press F11 to enter the Boot menu.
- Select the General-Purpose Operating System from the Boot Menu. For example, the Windows EFI Boot Manager in the image below.
.png)
Configuration Files and Folders
This section provides the location of files and folders required for further customization or configuration.
Important Configuration Files
The following files are important for configuration:
- Bootloader configuration file
RthLdr.config
The RthLdr.config file is a JSON text file format that points to RTOS image(s), RTS Hypervisor configuration file and the EFI boot file of the General-Purpose Operating System. The RthLdr.config file is located in \EFI\rts folder. You may modify this file if you want to rename or rebase the RTS Hypervisor configuration file or the RTOS image(s).
- Sample configuration files for the RTS Hypervisor:
The download package contains sample configuration files. The configuration file names may change depending on the downloaded package and the pre-installed General-Purpose Operating System.
The format for the sample configuration file name is:
(Pre-installed General-Purpose OS)_(Real-Time OS in download package).txt
For example:
Linux_VxWorks64.txtWindowsEFI_Linux.txtLinux_INtime.txtWindowsEFI_QNX.64txt
The sample configuration file is located in the \rth folder. You may modify this file to change the default CPU assignment, assign additional RAM to the RTOS or assign PCI(e), Mass Storage or USB devices according to your use case.
- System files for the Real-Time Operating System:
The image files which contain the Real-Time Operating Systems are located in the \rth\<RTOS>\ folder. The filesystems created from these images are non-persistent because they are created in the RAM. Changes to these file systems will be lost when the RTOS is restarted.
Note:
The folder structure above is for a Windows General-Purpose Operating System. During installation, a new FAT partition labelled "RTHDATA" is created. This partition contains the described files/folders.
For Linux General-Purpose Operating System, the setup destination is the EFI System Partition which is mounted to /boot/EFI
Configuring the Bootloader
The integrated RTS Hypervisor firmware uses a new congatec bootloader. The bootloader requires a configuration file. The file is for configuring the bootloader, but it also offers extended options for advanced RTS Hypervisor integrators and for variant-specific custom configurations with congatec support team.
Configuring the Partition
The congatec bootloader can access FAT partitions and its configuration file is in JSON file format. If you have a syntax problem during configuration, use an online JSON tool (for example, https://jsonlint.com/) to verify the JSON file format.
ESP Partition
For Linux GPOS, the bootloader configuration and all other files loaded by the bootloader are installed to the ESP partition. The ESP partition is of partition type FAT. The sample shows the RthLdr.config for a Linux GPOS installation. In Linux GPOS installations, the ESP partition is typically mounted to the mount point /boot/efi
Sample configuration:
{
    "version" : "3.0.0",
    "target" : {
       "type" : "variable"
               },
    "modules" : [
    {
    "name" : "license",
    "type" : "variable"
    },
    {
    "name" : "grubx64.efi",
    "file" : "EFI\\DISTRI\\grubx64.efi"
    },
    {
     "name" : "config",
     "file" : "rth\\Linux_Linux64.txt"
    },
    {
    "name" : "bzImage-rth",
    "file" : "rth\\Linux\\privileged\\6.1-rt_x86_64\\Debian11\\bzImage-rth"
    },
    {
    "name" : "initramfs-priv.cpio.gz",
    "file" : "rth\\Linux\\privileged\\6.1-rt_x86_64\\Debian11\\initramfs-priv.cpio.gz"
    }
    ]
}
ESP + FAT Partition
The bootloader supports access of up to two FAT partitions for loading components. The first partition is identified by the location of the configuration file EFI\rts\RthLdr.config
The second partition can be the ESP (EFI System Partition).
The Windows boot loader is located in the ESP. To make the bootloader refer to the ESP, the corresponding module entry must contain an additional parameter “type”, which must be set to efi (see sample configuration).
Sample configuration:
{
    "version" : "3.0.0",
    "target" : {
               "type" : "variable"
       },
    "modules" : [
    {
    "name" : "license",
    "type" : "variable"
   },
   {
    "name" : "bootmgfw.efi",
    "file" : "EFI\\Microsoft\\Boot\\bootmgfw.efi",
    "type" : "efi"
   },
   {
    "name" : "config",
    "file" : "rth\\WindowsEFI_Linux64.txt"
   },
   {
    "name" : "bzImage-rth",
    "file" : "rth\\Linux\\privileged\\5.15-xenomai_x86_64\\Debian11\\bzImage-rth"
   },
   {
    "name" : "initramfs-priv.cpio.gz",
    "file" : "rth\\Linux\\privileged\\5.15-xenomai_x86_64\\Debian11\\initramfs-priv.cpio.gz"
    }
    ]
}
Overriding a License File
To update the information in the license file, you need to load a new module from the RthLdr.config (create a new license.txt file).
Follow the steps below to override the integrated license file:
- Copy the new
license.txtfile to the designated location:- For a Windows GPOS installation, copy the new license.txt file to
\EFI\rthfolder in the "RTHDATA" partition. - For a GPOS Linux installation, copy the new license.txt to the
\boot\efi\rth\(or\boot\EFI\rth\) Linux folder.
- For a Windows GPOS installation, copy the new license.txt file to
- Update the contents of
RthLdr.configto load the license.txt file from the file system. The sample configuration below highlights the expected change in Windows GPOS:
{
   "version" : "3.0.0",
   "target" : {
            "type" : "variable"
            },
   "modules" : [
   {
    "name" : "license",
    "file" : "EFI\\rth\\license.txt"
   },
   {
    "name" : "bootmgfw.efi",
    "file" : "EFI\\Microsoft\\Boot\\bootmgfw.efi",
    "type" : "efi"
   },
   {
    "name" : "config",
    "file" : "rth\\WindowsEFI_Linux64.txt"
    },
    {
    "name" : "bzImage-rth",
    "file" : "rth\\Linux\\privileged\\5.15-xenomai_x86_64\\Debian11\\bzImage-rth"
   },
   {
    "name" : "initramfs-priv.cpio.gz",
    "file" : "rth\\Linux\\privileged\\5.15-xenomai_x86_64\\Debian11\\initramfs-priv.cpio.gz"
    }
    ]
}
The sample configuration below highlights the expected change in Linux GPOS:
{
    "version" : "3.0.0",
    "target" : {
       "type" : "variable"
               },
    "modules" : [
    {
    "name" : "license",
    "file" : "rth\\license.txt"
    },
    {
    "name" : "grubx64.efi",
    "file" : "EFI\\DISTRI\\grubx64.efi"
    },
    {
     "name" : "config",
     "file" : "rth\\Linux_Linux64.txt"
    },
    {
    "name" : "bzImage-rth",
    "file" : "rth\\Linux\\privileged\\6.1-rt_x86_64\\Debian11\\bzImage-rth"
    },
    {
    "name" : "initramfs-priv.cpio.gz",
    "file" : "rth\\Linux\\privileged\\6.1-rt_x86_64\\Debian11\\initramfs-priv.cpio.gz"
    }
    ]
}
- Save the changes and proceed to override RTS Hypervisor file if required.
Overriding the RTS Hypervisor
To override the RTS-hypervisor file, follow the steps below:
- Contact congatec Sales team to get the RTS Hypervisor file in
.elfformat - Copy the
rthx86.elffile toRTHDATA\EFI\rth\for windows GPOS or to\boot\efi\rth\(or\boot\EFI\rth\) for Linux GPOS. - Update the contents of
RthLdr.configfor the target system.
- The sample configuration below highights the expected change in Windows GPOS:
{
   "version" : "3.0.0",
   "target" : {
"type" : "elf",
"file" : "EFI\\rth\\rthx86.elf"
               },
   "modules" : [
   {
    "name" : "license",
    "file" : "EFI\\rth\\license.txt"
   },
   {
    "name" : "bootmgfw.efi",
    "file" : "EFI\\Microsoft\\Boot\\bootmgfw.efi",
    "type" : "efi"
   },
   {
    "name" : "config",
    "file" : "rth\\WindowsEFI_Linux64.txt"
    },
    {
    "name" : "bzImage-rth",
    "file" : "rth\\Linux\\privileged\\5.15-xenomai_x86_64\\Debian11\\bzImage-rth"
   },
   {
    "name" : "initramfs-priv.cpio.gz",
    "file" : "rth\\Linux\\privileged\\5.15-xenomai_x86_64\\Debian11\\initramfs-priv.cpio.gz"
    }
    ]
}
The sample configuration below highlights the expected change in Linux GPOS:
{
    "version" : "3.0.0",
    "target" : {
"type" : "elf",
"file" : "rth\\rthx86.elf"
               },
    "modules" : [
    {
    	"name" : "license",
    	"file" : "rth\\license.txt"
    },
    {
    "name" : "grubx64.efi",
    "file" : "EFI\\DISTRI\\grubx64.efi"
    },
    {
     "name" : "config",
     "file" : "rth\\Linux_Linux64.txt"
    },
    {
    "name" : "bzImage-rth",
    "file" : "rth\\Linux\\privileged\\6.1-rt_x86_64\\Debian11\\bzImage-rth"
    },
    {
    "name" : "initramfs-priv.cpio.gz",
    "file" : "rth\\Linux\\privileged\\6.1-rt_x86_64\\Debian11\\initramfs-priv.cpio.gz"
    }
    ]
}
- Save the changes and make sure you are using the correct license file.
Bootloader Limitations
The bootloader has the following limitations:
- The modules loaded by the bootloader must be on either a FAT/FAT32 formatted partition which contains
RthLdr.configor an EFI system partition (ESP) - A maximum of 16 modules can be loaded by the bootloader including the compulsory license and config modules.
- All the modules are loaded below the 4 GB memory address.
Note:
All modules loaded must fit into the available address space provided by the hardware and firmware configuration below 4GB.
Therefore, we recommended reserving at least 1 GB of the available space below 4GB for use in the Operating Systems and the RTS Hypervisor.
RTS Hypervisor Use Cases
The real-time hypervisor software allows you to consolidate functionality that previously required multiple dedicated systems on a single x86 hardware platform.
Consolidating High-Performance Human Machine Interface and Machine Control
This workload consolidation scenario shows that 3D design software and simulation software can work seamlessly alongside the real-time machine control on a single x86 system.
.png)
| Features/OS | GPOS | RTOS |
|---|---|---|
| High resolution touch display | x | |
| Software update agent | x | |
| Motion control | x | |
| Ethernet field bus | x | |
| Backup agent | x |
Consolidating Machine Control and Communication Gateway
This sample use case describes connecting IT and OT operations separately but with the same device. Here, the RTS Hypervisor on the module is the key feature that combines these workload scenarios.
.png)
| Features/OS | GPOS | RTOS |
|---|---|---|
| Cloud connection agent | x | |
| Software update agent | x | |
| Verified boot | x | x |
| Failsafe update | x | x |
| Ethernet field bus | x | |
| Encrypted file system | x |
Consolidating Mobile Test and Measurement Device
With this computing box, data is captured or injected in real time within vehicle system communication.
.png)
| Features/OS | GPOS | RTOS |
|---|---|---|
| Gather and inject real-time communication | x | |
| Filter and store data series | x | |
| Upload data measurement series when network is available | x |
Offered Packages
For the Hypervisor on Module, congatec offers two types of packages:
- Evaluation Package
- Full Package
The evaluation package has less features compared to the full package. The table below shows the differences.
| Features | Evaluation Package Version | Full Package Version |
|---|---|---|
| RTOS pre-built evaluation image | Included | Included |
| Product documentation | Included | Included |
| libRth usage in applications | Possible | Possible |
| RTOS application development | Possible | Possible |
| RTOS components to rebuild image for further integration | Not included | Included |
| License | Expires (with time limit) | No Expiration (without time limit) |
Uninstalling the Hypervisor
For Windows as GPOS
- Open Control Panel → Programs and Features
- Right-Click
Real-Time Hypervisor Drivers and Tools RX.Y:Z:NNNNNand then click Uninstall. - The unistallation process begins. When the uninstallation completes, all Hypervisor components are removed from Windows OS.
- Restart the system to boot into Windows EFI Boot Manager (as explained in section Override the Default Boot Selection Manually)
- Open Control Panel → System and Security → Administrative Tools → Create and format disk partitions.
- Right-click the RTHDATA partition and then click Delete Volume.
- Verify that the partition is no longer visible in File Explorer
- To remove Integrated RTS Hypervisor entry from the BIOS setup menu, see section Change Default BIOS Entry (Optional)
For Linux as GPOS
The installation script used for installing the Hypervisor has an additional option to remove all Hypervisor-related installed files from the system.
- Boot into Integrated RTS Hypervisor.
- Navigate to the download package with installation script for Linux →
installation_for_linux.sh - Execute the command:
sudo installation_for_linus.sh --uninstall
- This will remove RTS Hypervisor tools and dkms packages. It will also delete
/boot/efi/rthdirectory and content of/boot/efi/EFI/rts - To remove Integrated RTS Hypervisor entry from the BIOS setup menu, see section Change Default BIOS Entry (Optional)
Change Default BIOS Entry (Optional)
Follow the steps below to remove the Integrated RTS Hypervisor entry from BIOS setup menu:
- Restart the system. Press F2 or DEL during POST to enter the BIOS setup menu
- Go to Boot tab and select 1st Boot Device in Boot Options Priority.
- Disable the option for Integrated RTS Hypervisor
- Select the option of your choice as Boot Option #1.
Go to Save & Exit table dn select “Save Changes and Exit”. The system restarts.
Troubleshooting
RthLdr.config not Found
.png)
This message is displayed for a short time before the system automatically boots the General-Purpose Operating System (without RTS Hypervisor).
Possible Reasons:
- Firmware was configured before the installation package was installed.
- The
RthLdr.configfile was removed accidentally or during uninstallation.
Steps to Solve it:
- To get the RTS Hypervisor running again, download and install the software package as described in this sections Download Installation Package and Install the Downloaded Package
- To use your module without RTS Hypervisor, disable the "Integrated RTS Hypervisor" from Boot Options Priority, under Boot tab in the BIOS setup menu.
Invalid License
.png)
The message stays on the screen until you turn off the system and then turn it back on.
Possible Reasons:
- Evaluation license is expired. Contact congatec Sales team for more information.
- Accidentally using the settings of the evaluation license
RthLdr.configfor the RTS Hypervisor.
Steps To Solve it:
- Check that you are using the correct
RthLdr.configfile for your project. When in doubt, use "readtrace" to display your project number. - Contact congatec Sales team for a valid license.
RTS Hypervisor Configuration Error
- Incorrect key use (cores and CPU options were configured together)
.png)
- Issue with shared memory partition
.png)
The messages stay on the screen until you turn off the system and then turn it back on.
Possible Reason:
By applying manual changes to the RTS Hypervisor configuration file, you made changes to the RTS Hypervisor configuration that prevented your system from booting.
Steps to solve it:
- Press F11 during system boot and select your General-Purpose Operating System (without RTS Hypervisor)
- Revert to the original RTS Hypervisor configuration file in the download package (refer to sections Download Installation Package and Install the Downloaded Package)
How to get Access to Full Package
For access to the full package, contact congatec Sales team via the online “Request Quote“ form at https://www.congatec.com/en/products/hypervisor-products/
After finalizing the sales procedure, you will get a new delivery package that includes the license.txt and RthLdr.config files. These files will override the included license to a full development and production license issued for your project.
Delivery of the full package version also includes additional components for further software development tasks (see section Offered Packages)
Additional Support or Information
For questions, recommendations or guidance contact support@congatec.com The support team will respond to your request while your evaluation license is valid.
If you purchase RTS Hypervisor, three support packages are available: Basic, Extended and Premium support. Contact congatec Sales team via the online “Request Quote“ form at https://www.congatec.com/en/products/hypervisor-products/